
How to Build a Custom Bedroom Built-In: Desk, Window Seat, Dresser & Shelves
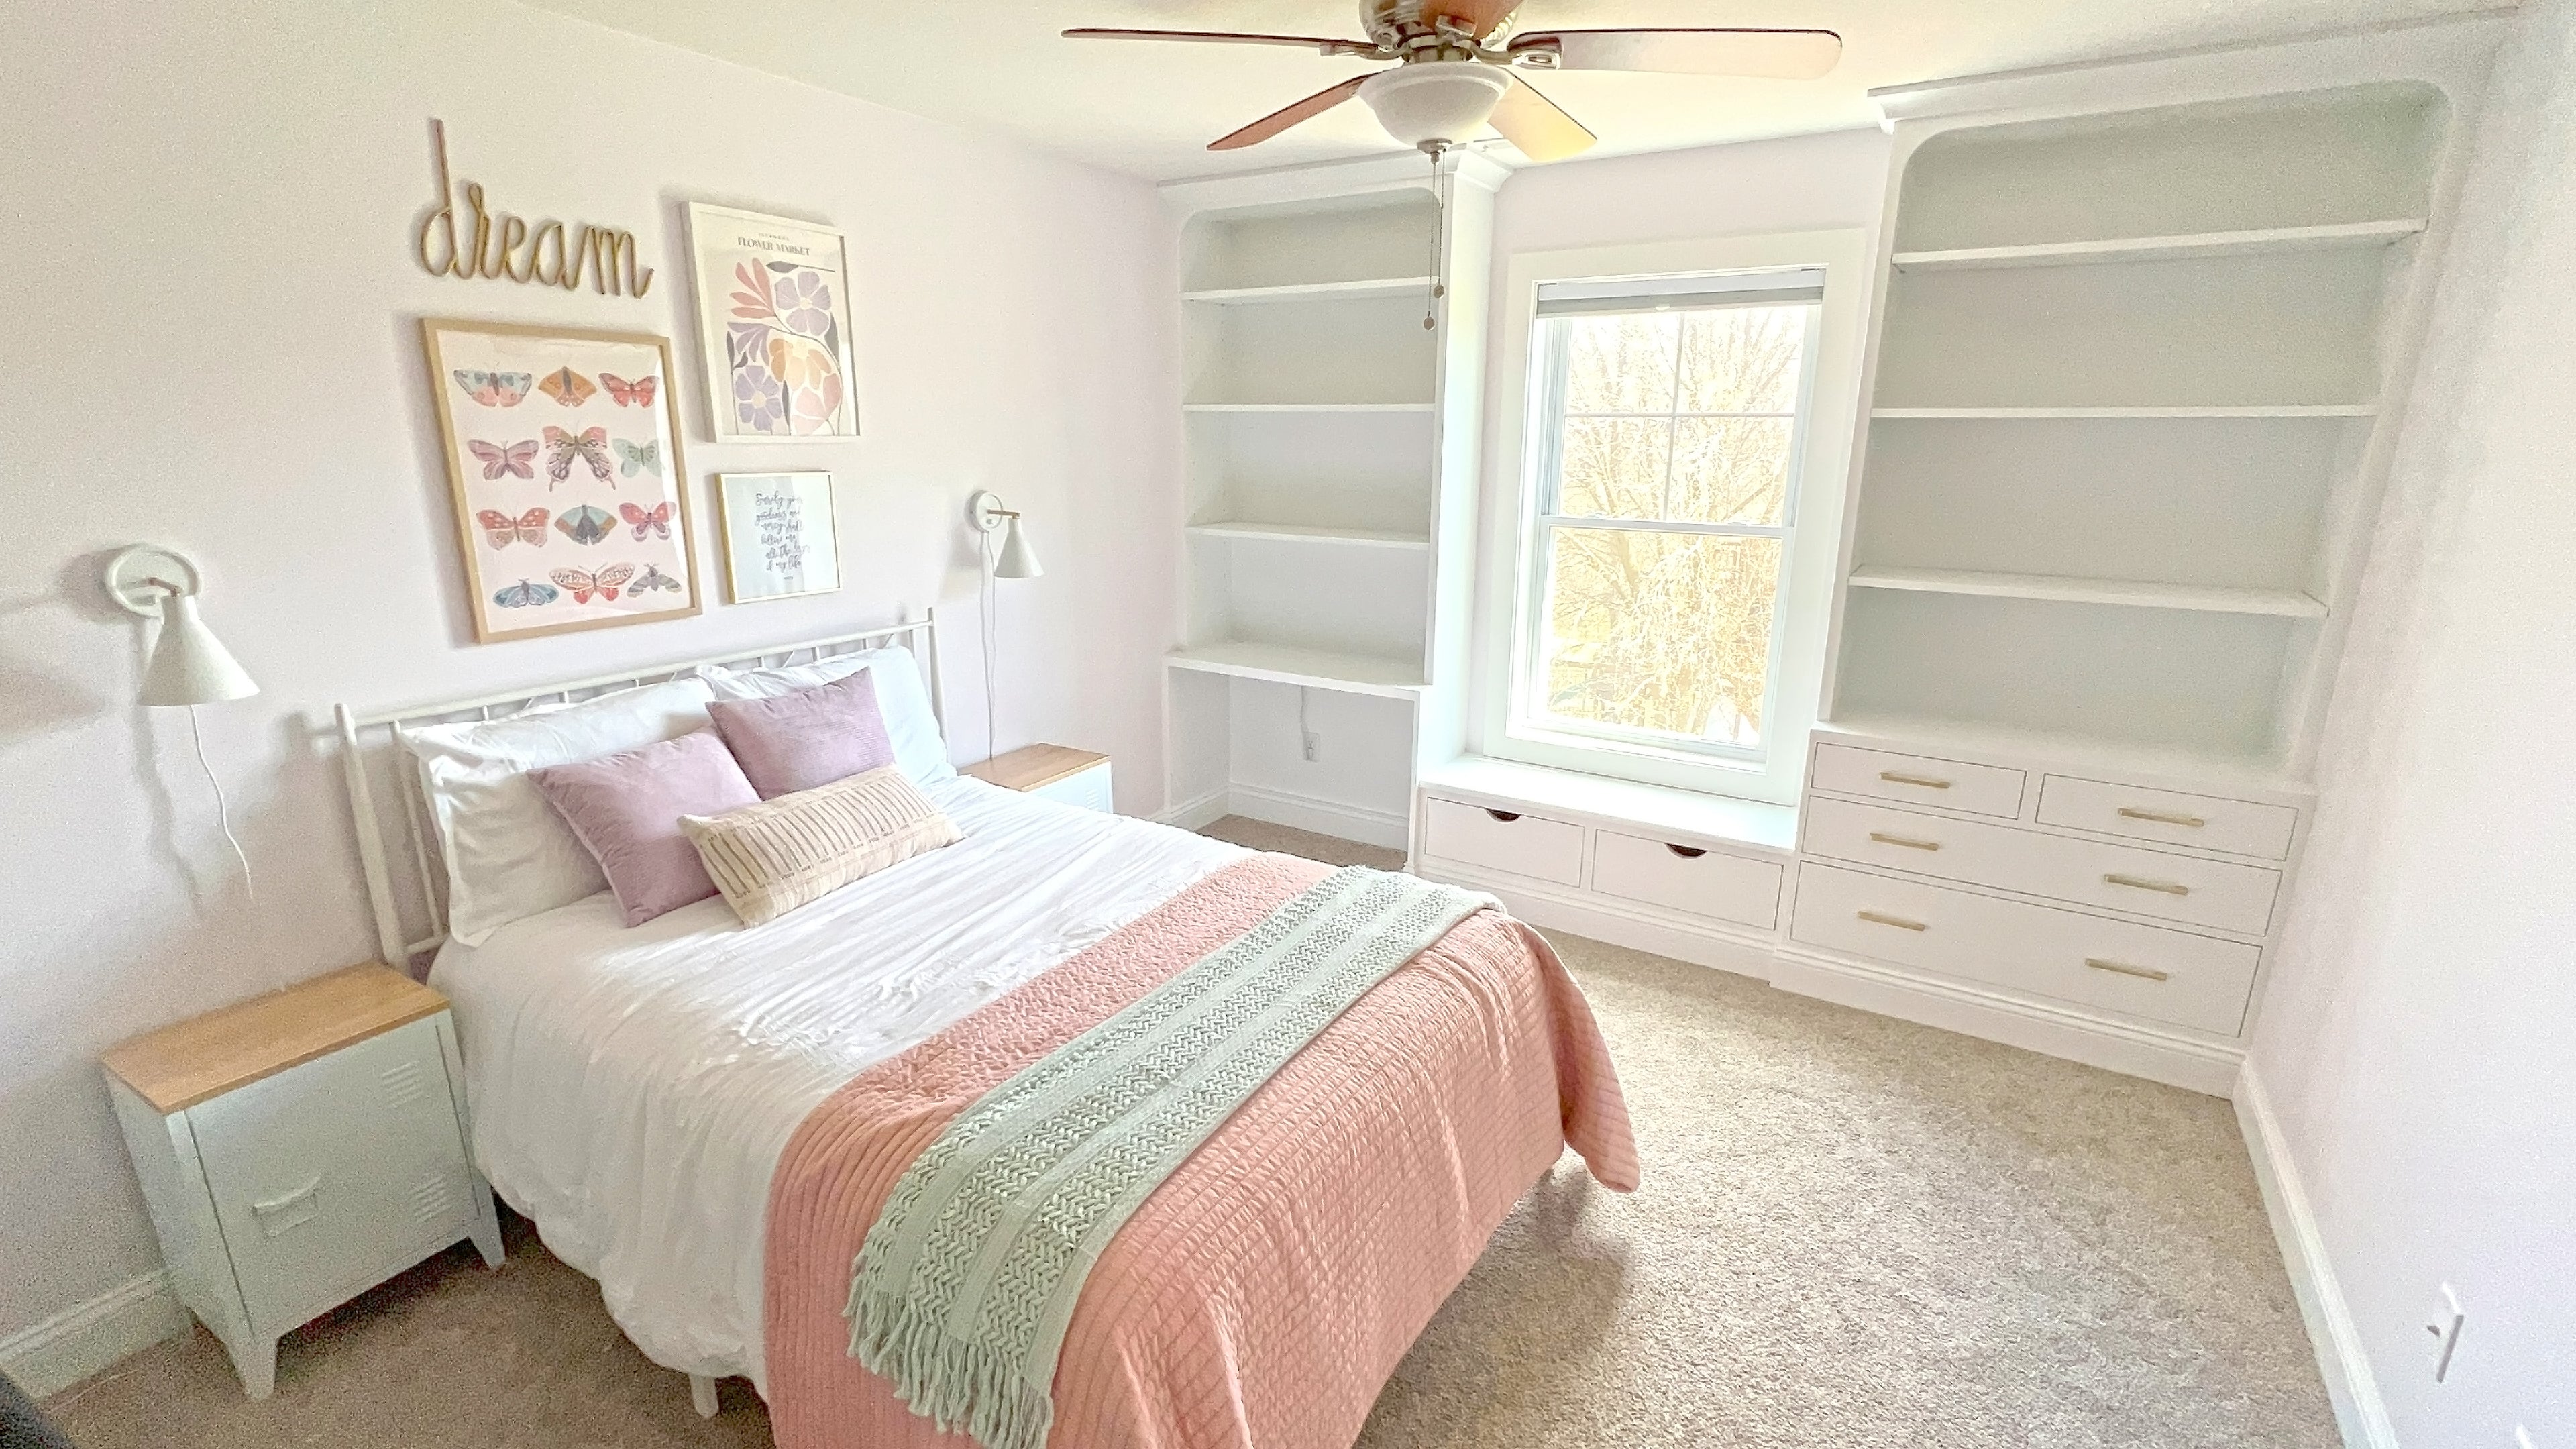
Creating a custom-built bedroom space with a desk, window seat, dresser, and shelves is a smart way to maximize storage, functionality, and style. A well-designed bedroom built-in transforms your space into a cozy, efficient, and highly personalized retreat.
In this guide, I’ll walk you through the complete DIY process from planning and materials to construction and finishing. Whether you're building a multifunctional bedroom nook or just adding a DIY window seat with storage, this post will help you get there.
If you are more of a visual person here is a step-by-step build video that I made showing how I built this exact bedroom built-in. 💡 Watch the full build video of this project to follow along in real-time.
Step 1: Plan Your Bedroom Built-In
Every great DIY starts with a solid plan. Before you pick up a tool, make sure you’ve carefully considered the layout, usage, and dimensions of your built-in. If you want to build this exact bedroom built-in 🛠️ Download the full project plans and 3D model to start your build today.
✅ Assess Your Needs
Think about how you’ll use each feature:
-
Do you need a full-size DIY desk for working or studying?
-
Should the window seat include storage for books or blankets?
-
How much drawer space do you need in the dresser?
This will guide your layout decisions and material needs.
📏 Measure the Space
Use a tape measure and take accurate measurements of:
-
The wall’s width, height, and depth
-
Floor-to-window height
-
Side margins around the window
-
Baseboards, outlets, vents, etc.
✏️ Sketch Your Built-In Design
Once measured, sketch your built-in design. You can use graph paper or a digital tool like SketchUp (you can download my free SketchUp model and plans for the build I made in my daughter’s room).
Step 2: Choose the Right Materials for Durability & Design
🪵 Wood vs. Plywood vs. MDF
Plywood is my go-to for all built-ins. It's stronger and more stable than MDF, and less expensive than hardwood. Use:
-
¾” plywood for shelves and seat tops
-
**½” for drawer boxes
-
Solid wood** for fronts if you want a premium look
MDF is affordable and easy to paint but may sag over time.
🔩 Hardware Matters
Invest in high-quality soft-close drawer slides, cabinet hinges, and stylish knobs or pulls.
🎨 Finishing Materials
Choose a paint or stain based on your room aesthetic. I recommend:
-
Durable enamel paint for heavy-use areas
-
Clear coat for stained wood to enhance longevity
Step 3: Build the Frame
The frame is the backbone of your built-in. Here's how to construct it:
🔧 Mark the Layout
Draw your layout on the wall using a level and pencil.
🧱 Build the Base (Optional)
Most built-ins use a 2x4 base frame secured to the floor and wall. I skipped this on my daughter’s build—check out my primary closet video for the “frameless” method.
🪚 Construct the Frame
Use vertical and horizontal supports (2x4s) to define each section—desk, seat, shelves, etc. Anchor them securely with screws, making sure everything is level and plumb.
🪵 Install the Back Panel
Secure a plywood or MDF panel to the back of the unit to add structure and clean up the appearance.
Step 4: Add Functional Components
💻 Install the Desk
Cut and mount the desk surface. Add support brackets underneath and drill cable management holes if needed.
📚 Build the Window Seat with Storage
Cut a snug-fitting seat, add a box underneath for storage, and use a hinged lid for easy access.
🧺 Assemble the Dresser Drawers
Build drawer boxes from plywood or MDF. Use drawer slides and ensure smooth function. Add drawer fronts, knobs, or pulls.
📐 Install Adjustable Shelves
Cut shelves to size and use cleats or brackets. Adjustable options give you flexibility over time.
I used 3/4in Plywood to build my desk and shelves.

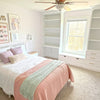
Here is how the dresser and shelves turned out.

Step 5: Finishing Touches That Make It Shine
✂️ Add Trim & Molding
Use trim to hide seams and gaps and to match your room’s style. Add:
-
Baseboard trim at the bottom
-
Crown molding at the top
🎨 Paint or Stain
Apply a primer first. Use multiple coats of quality paint or stain for a professional finish.
🛠️ Install Final Hardware
Attach drawer pulls, door knobs, and other functional accents.
🪟 Add a Cushion & Accessories
Top the window seat with a custom cushion and throw pillows. Use bins and baskets to keep shelves organized.
Step 6: Enjoy Your New Built-In Bedroom Space
You’ve just transformed your bedroom with a custom built-in desk, window seat, dresser, and shelves that fits your exact needs. Not only did you add style and function, but you saved money while learning valuable skills along the way.
Built-In Maintenance Tips
-
🧼 Clean regularly: Dust and wipe down surfaces
-
🔩 Tighten hardware: Keep everything functioning smoothly
-
🛡️ Protect surfaces: Use a clear coat on high-use areas or coasters under drinks
Final Thoughts
A DIY bedroom built-in is more than just a weekend project—it’s a statement piece that enhances daily life. Whether you’re creating a study nook, reading corner, or maximizing bedroom storage, this project empowers you to build smarter, save money, and customize your space.


