
DIY Vintage Lemonade Stand – Easy Summer Woodworking Project for Beginners
DIFFICULTY: Beginner
Project Type: DIY Lemonade Stand
Ideal For: Summer projects, family activities, woodworking beginners, kids’ business ideas
Looking for a fun summer woodworking project you can build with your kids?
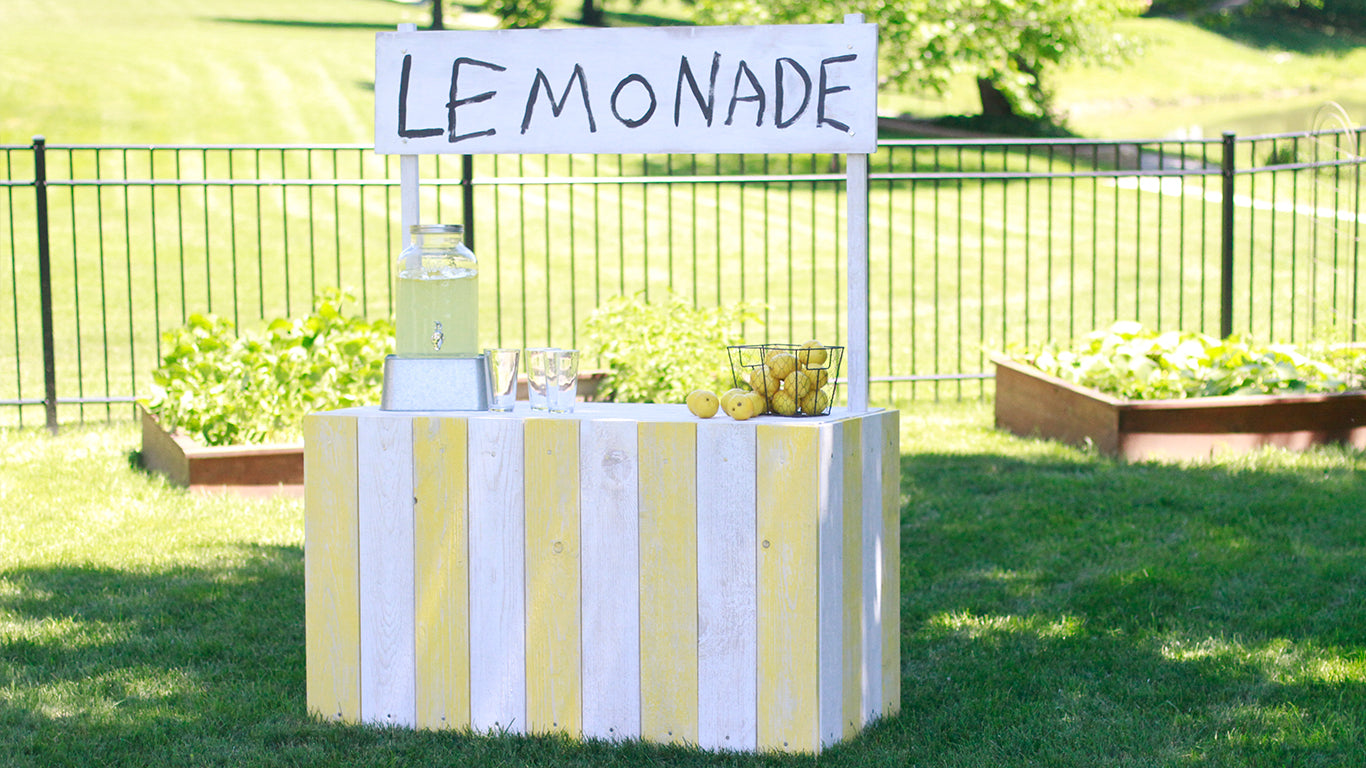
In this DIY tutorial, I’ll show you how to build a foldable vintage lemonade stand that’s perfect for backyard fun, garage sales, or your child’s first small business. Inspired by the lemonade stands I used to run as a kid (with way too much taste testing and not enough profit), I wanted to create a stylish and functional design that folds flat for easy storage when summer ends.
This DIY vintage country chic lemonade stand is made from affordable materials you can find at any local hardware store—and it’s easy enough for beginners to build.
🛠️ Materials Needed for This DIY Lemonade Stand
-
Plywood (4x4 sheet, ¾”)
-
Rough sawn boards:
-
1x6 boards
-
1x4 boards
-
-
Sandpaper (60 grit) → Buy on Amazon
-
Wood Glue → Buy on Amazon
-
Paint Colors: White, Yellow, Light Gray
-
Polyurethane or Clear Coat (for sealing)
🔩 Hardware:
-
Screws (1½–2 in.) → Buy on Amazon
-
4 x ¼" diameter, 2" hex bolts + wing nuts → Buy
-
2 x ⅛" hex bolts + wing nuts → Buy
-
Hinges (4) → Buy
-
L Brackets (4) → Buy
🔧 Tools You’ll Need
-
Miter Saw → Buy
-
Table Saw → Buy
-
Jigsaw → Buy
-
Drill & Bits → Buy
-
Orbital Sander → Buy
-
Nail Gun (Cordless or Air) → Buy
-
Clamps, Level, Hammer, Tape Measure, Putty Knife
-
Kreg Pocket Hole Jig + Face Clamp → Buy
📐 Optional Software for Planning
-
SketchUp: www.sketchup.com
-
Adobe Creative Cloud → Buy
📋 Step-by-Step Instructions
1. Watch the Video & Download the Plans
Get a full visual walkthrough and blueprints.
2. Buy Your Supplies
Gather all the tools and materials listed above.
3. Select the Right Wood
Look for rough sawn boards with natural texture—perfect for that vintage look.
4. Cut Your Wood to Size
Use your miter and table saw to make all necessary cuts.

5. Paint the Boards
Use spray paint or regular latex paint in white and yellow.

6. Seal the Paint
Apply a clear polyurethane or sealant before distressing.
7. Sand for a Worn Look
Use 60 grit sandpaper to distress the wood—focus on edges and corners.
8. Apply the Aging Coat
Create a weathered look by brushing on a diluted gray wash. Test on scrap wood first.

9. Wipe It Down
Let it soak in, then wipe with a rag. The longer it sits, the darker it gets.
10. Assemble the Panels
Connect the front, sides, and top using nails or a nail gun.
11. Install Hinges
Attach hinges to allow folding for easy off-season storage.

12. Add the Top and Sign Poles
Secure everything together and insert your display poles.
13. Attach the “Lemonade” Sign
This gives your stand that perfect finishing touch.

14. Make Lemonade & Open for Business!
Set up your stand, make a pitcher of fresh lemonade, and enjoy the summer vibes.

🏁 Conclusion: Your First Lemonade Stand Build is Done!
You just built a collapsible DIY lemonade stand that’s perfect for kids and beginners alike. Not only does it look great with its country chic style, but it also folds flat for winter storage. This project is a great way to introduce kids to entrepreneurship, woodworking, and the satisfaction of building something from scratch.
If you liked this tutorial, check out my other DIY woodworking projects and summer build ideas.
👉 Follow me on YouTube, Instagram, Facebook, and Pinterest for more builds, tips, and tutorials.
Happy building – and don’t drink all the profits!
📌 SHARE THIS PROJECT ON PINTEREST


